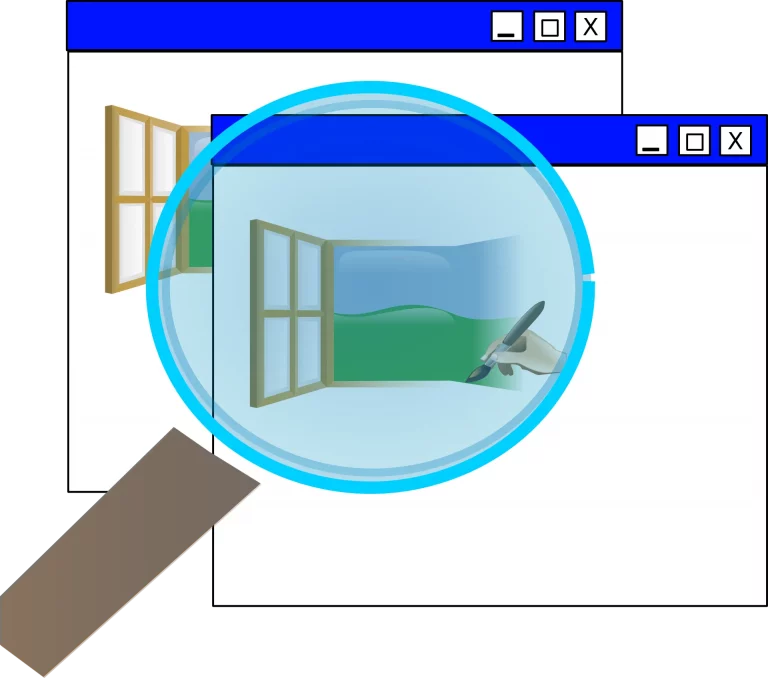
snip & sketch: a hidden gem
DC the Computer guy
Since October 2018, Windows 10 has included a great program called Snip & Sketch. It is a wonderfully simple tool for screen capturing that is very handy.
I fell in love with its predecessor, the Snipping Tool, which came pre-installed in the very unpopular Windows Vista. If you recall, Vista tried to replace the much-beloved operating system, Windows XP, and boy did it come with a lot of issues. Between these problems and the existing love of the older OS, very few people saw any reason to switch. With that said, even with those issues, Vista did have a lot of positives, many of which went on to be included in Windows 10. One of those was the Snipping Tool.
Since CLARK has grown, I don’t get to go out on jobs much anymore, but back when I did – whether it was installing technology, fixing issues, or just doing maintenance – I’d routinely spend a little time with my clients, showing them little tips to make their jobs easier. The Snipping Tool was always one of their favorites. It always amazed me how many people didn’t know about this great little tool. But, once I showed it to them and provided a few handy examples of its use, clients would almost always say something like, “Wow, I wish I’d known about this a long time ago”.
Although you can still find the Snipping Tool, it has been officially retired and replaced with Snip & Sketch, which offers a lot more features.
Some Easy Uses
There are a lot of situations where having a tool like Snip & Sketch comes in handy. Here are just a few of them.
Record Error Messages. I can’t tell you how many times a client would call to tell me that they got an error message but didn’t remember what it said. After being unable to replicate it, I almost always heard, “I promise you I’m not making this up.” Rather than leave them frustrated, I would show them how to use this handy screen capture tool, and explain that the next time the error came up, they could get a picture of it and then send it to me. Problem solved!

Create User Manuals. I used to create little 1 or 2-page How-To manuals for clients. For example, if a client wanted to know how to create a rule in Microsoft Outlook, I would use the screen capture tool to get pictures of every mouse click of the process, paste the pictures into word, and write brief instructions. With a little effort, I could give my clients a step-by-step guide with pictures to make it easy!
Temporarily Capture Information. Sometimes, when I’m doing research, I’ll see a topic that I want to dig a little deeper into, but I’m not finished with my current research. When that happens it’s easy enough to open Snip & Sketch, take a quick screen capture of the new topic, and then continue on the current topic.
In addition to these, I use Snip & Sketch to share relevant information with clients and employees, record existing settings when I’m working on a system, or capture an interesting quote while cruising the Internet. I can come up with countless others, there is a long list of ways it’s super handy.
A Simple How-To
Remember how I said that you can use it to make little How-To manuals? Well, here we go!
The program can be found by scrolling down your apps list to the S’s, or by typing Snip & Sketch into the search bar. Though I’m going to show you not one, but two easier ways to get to it later.
And then click on the Snip & Sketch app.

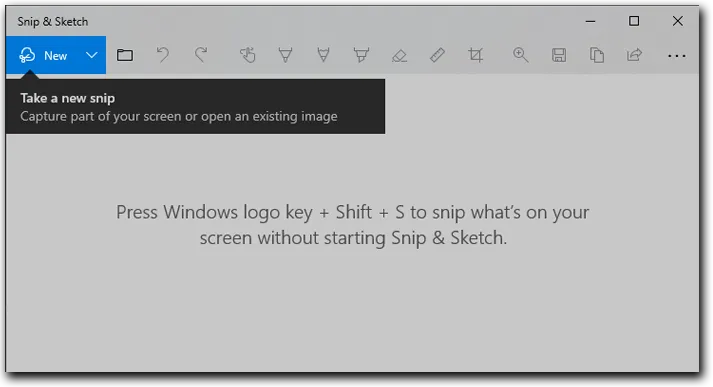
The Snip & Sketch program will then open and you’ll be able to take your first screen capture. That’s it.
If you prefer, you can use shortcut keys to take a screen capture without starting the program, and immediately paste it into Word or other programs.
Once you’ve opened it up, you will see that there are a variety of tools in here to allow you to draw on the image, erase, measure, and even crop out unnecessary areas. When you’re done, you save it. It really is just this easy.
My suggestion is to screen capture something, anything, and click around on the icons. Reading about this stuff is great, but there really is no better way to learn it than to play around with it for a while.
But before I go, here are a couple of Pro Tips.
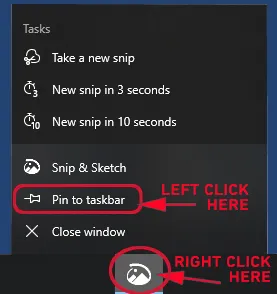
Tip #1: Pin It!
and left-click on ‘Pin to taskbar’.
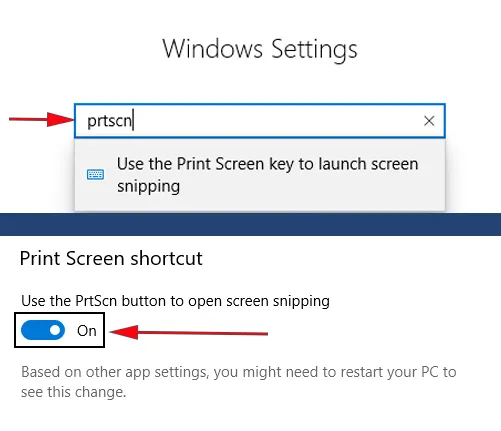
Tip #2: Print Screen!
And if you’re one of those people like me who prefers keyboard shortcuts, there’s an easy way to set the PRT SCN button to open Snip & Sketch.
First, open Settings and type PrtScn in the search bar.
Then turn on the option to use the PrtScn key as a shortcut to open Snip & Sketch.
And if for some reason you don’t have Snip & Sketch, it is available here for free under the retired name “Snipping Tool.”

Darren Clark
President And Owner
I left big business to start Clark Computer Services in 2003; not because I had a grand vision, but because I had three young children who needed their Dad around. Knowing I had to replace my salary, I went door-to-door visiting small businesses to introduce myself and ask if they needed IT support. I heard story after story from business owners and office managers about IT companies not returning calls and emails, grumpy technicians showing up late or not at all, and systems being down for days, weeks, and in some cases…months. I realized quickly that there was a clear and pressing need for reliable, honest, and professional IT support completed pleasantly and on time.